Diary of a Camper Conversion
When I collected the plywood yesterday, I left the timber merchant a cutting list for some parts I needed for the cabinets. This morning I got a call saying they were ready and so went to pick them up.
I’m still not 100% finished designing the cabinets, but I know the overall height and so that’s enough to be able to order what I need. I used this excellent and free website called OpiCutter to get the best layout for my boards. Basically you put in all your finished panel sizes, and the plywood sheet size and then it works out the most efficient way to arrange them so you only have to buy the minimum number of plywood sheets! Genius! It even provides you with a sheet you can print out and give to the cutter to follow, showing all the cuts – honestly, I’m so excited by this mundane process that’s been made so simple.
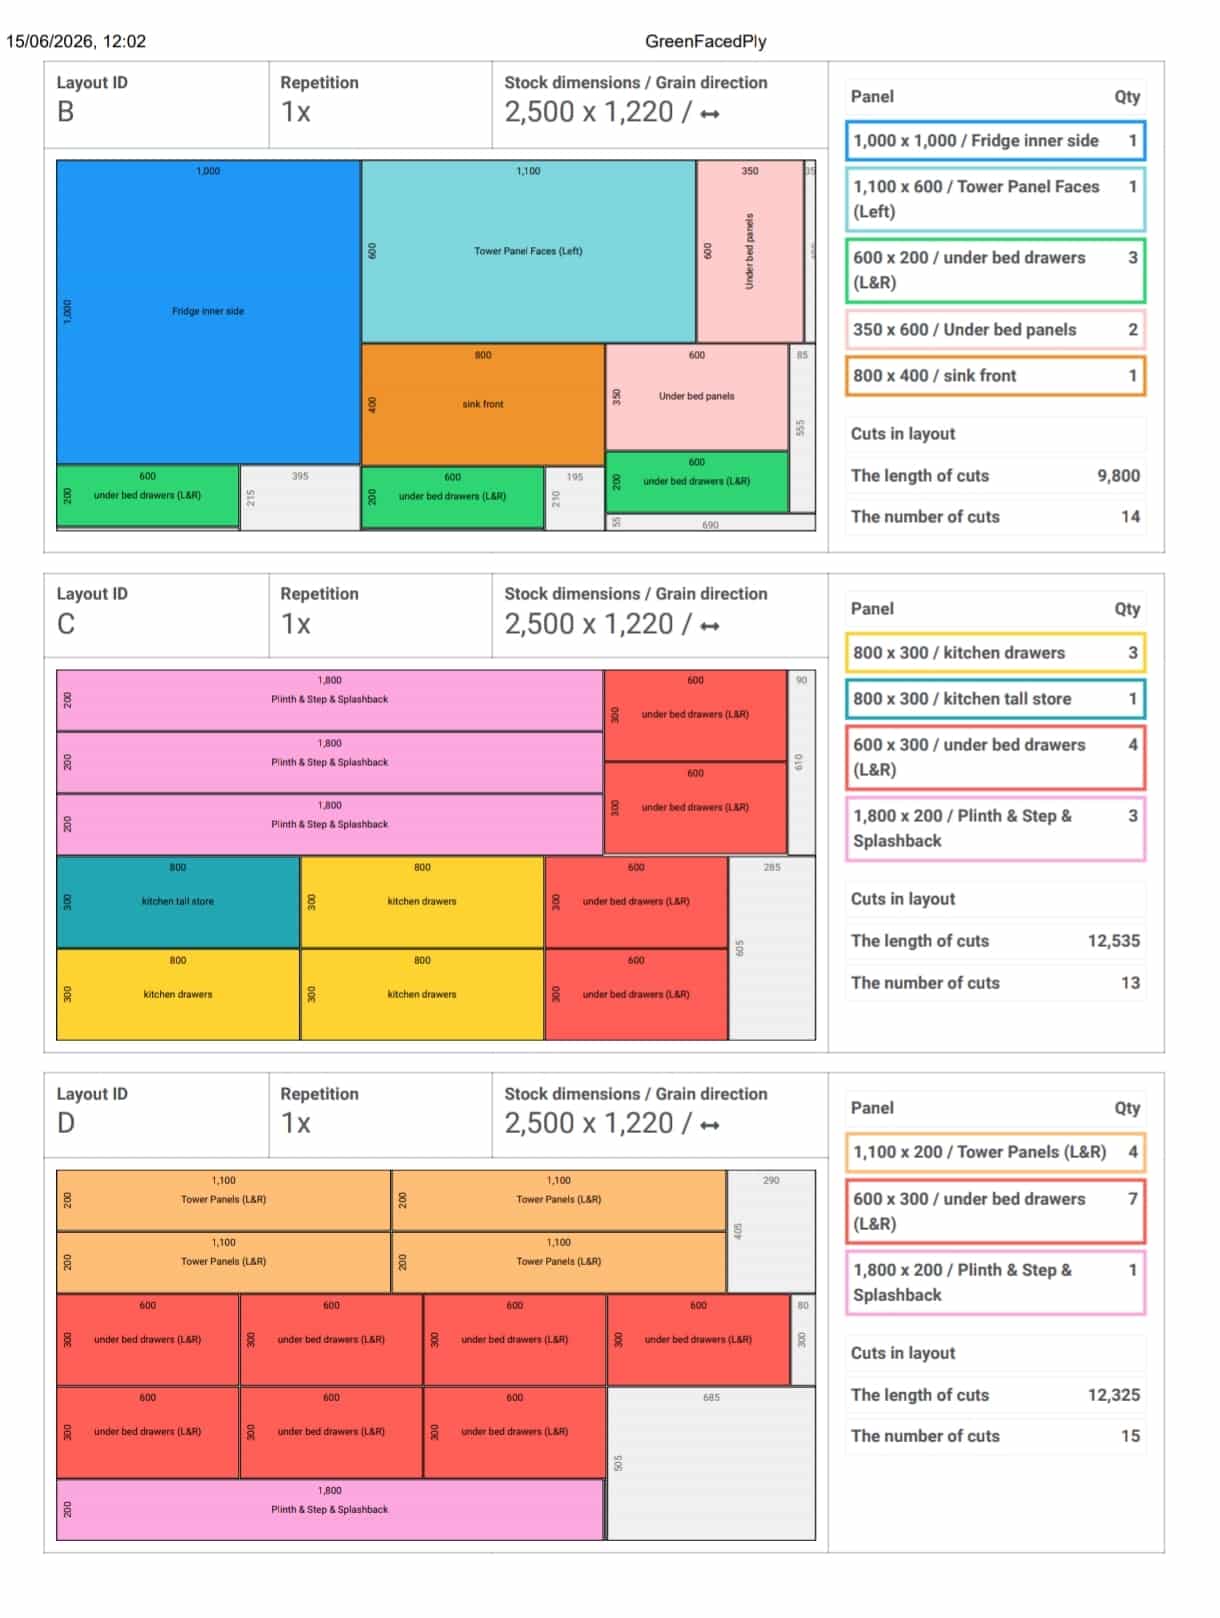
There was a small cutting fee for the work, but I don’t have a table saw, or a track saw (or the ability to cut straight as it turns out) so this was the best way to get consistent and dimensionally accurate panels to work with. I want to make sure I at least start with stuff that’s square, and I plan to build this cabinet outside the van on a -mostly- level surface so that its all as square as possible. I just built my last vans cabinets in-situ and it worked but it was all kinds of wonky. This caused problems when I came to try and put in drawers, so I didn’t want that headache again.
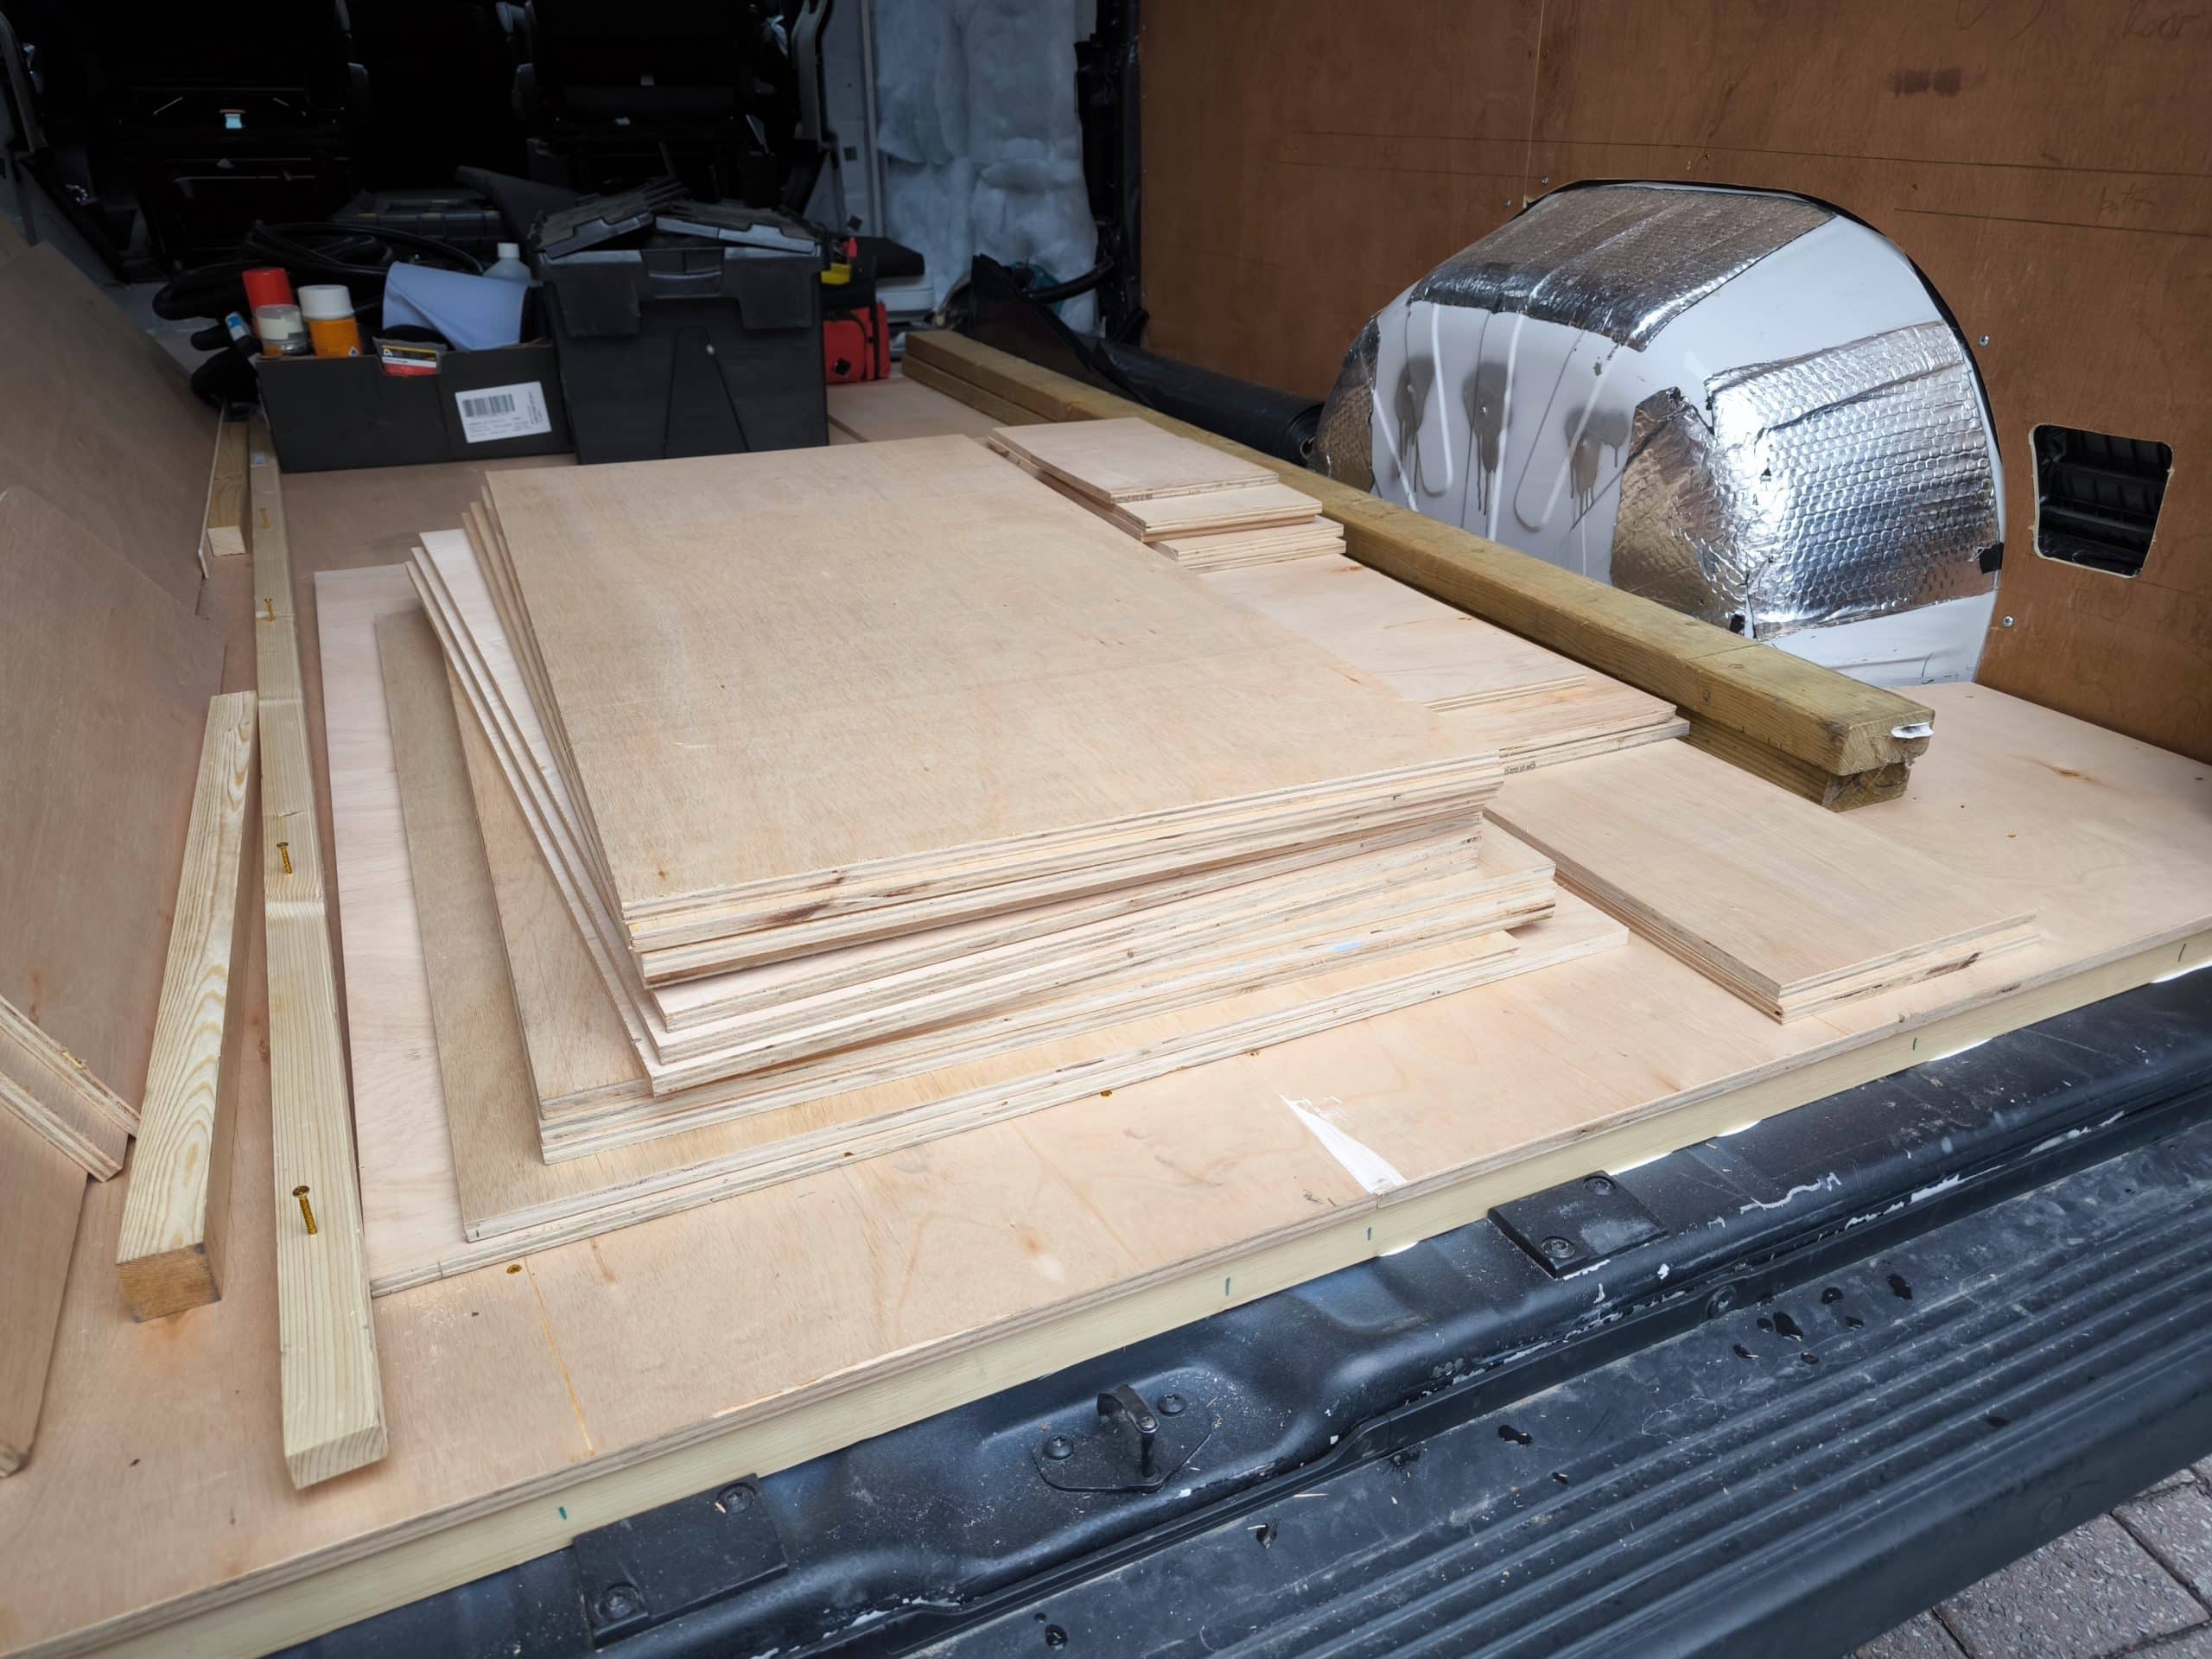
Parts collected I then hand-balled everything in the van down to the shed which is where these will take shape. Van clear, I then spent the next couple hours making sure all my measurements made sense, fit where I expected them and left enough space for the components I needed.
For example – the fridge – around which the majority of the kitchen is based. I wanted this to be on really heavy duty latching drawer mechanism. This is so its as worktop height so its easy to use, but also clears the step that will be behind the swivel chairs. (the step is so your feet aren’t dangling and gives somewhere for the air con ducting to run) The Fridge is 775mm long over all and so I’m using 800mm drawer slides. This give just 25mm of clearance for the face of the drawer and the overhang of the kitchen worksurface. It’s INCREDIBLY tight to fit it in, but works in CAD land. I’m going to find out pretty soon if it works in the real world. One of the deciding factors of this will be my fabrication skills… foreshadowing
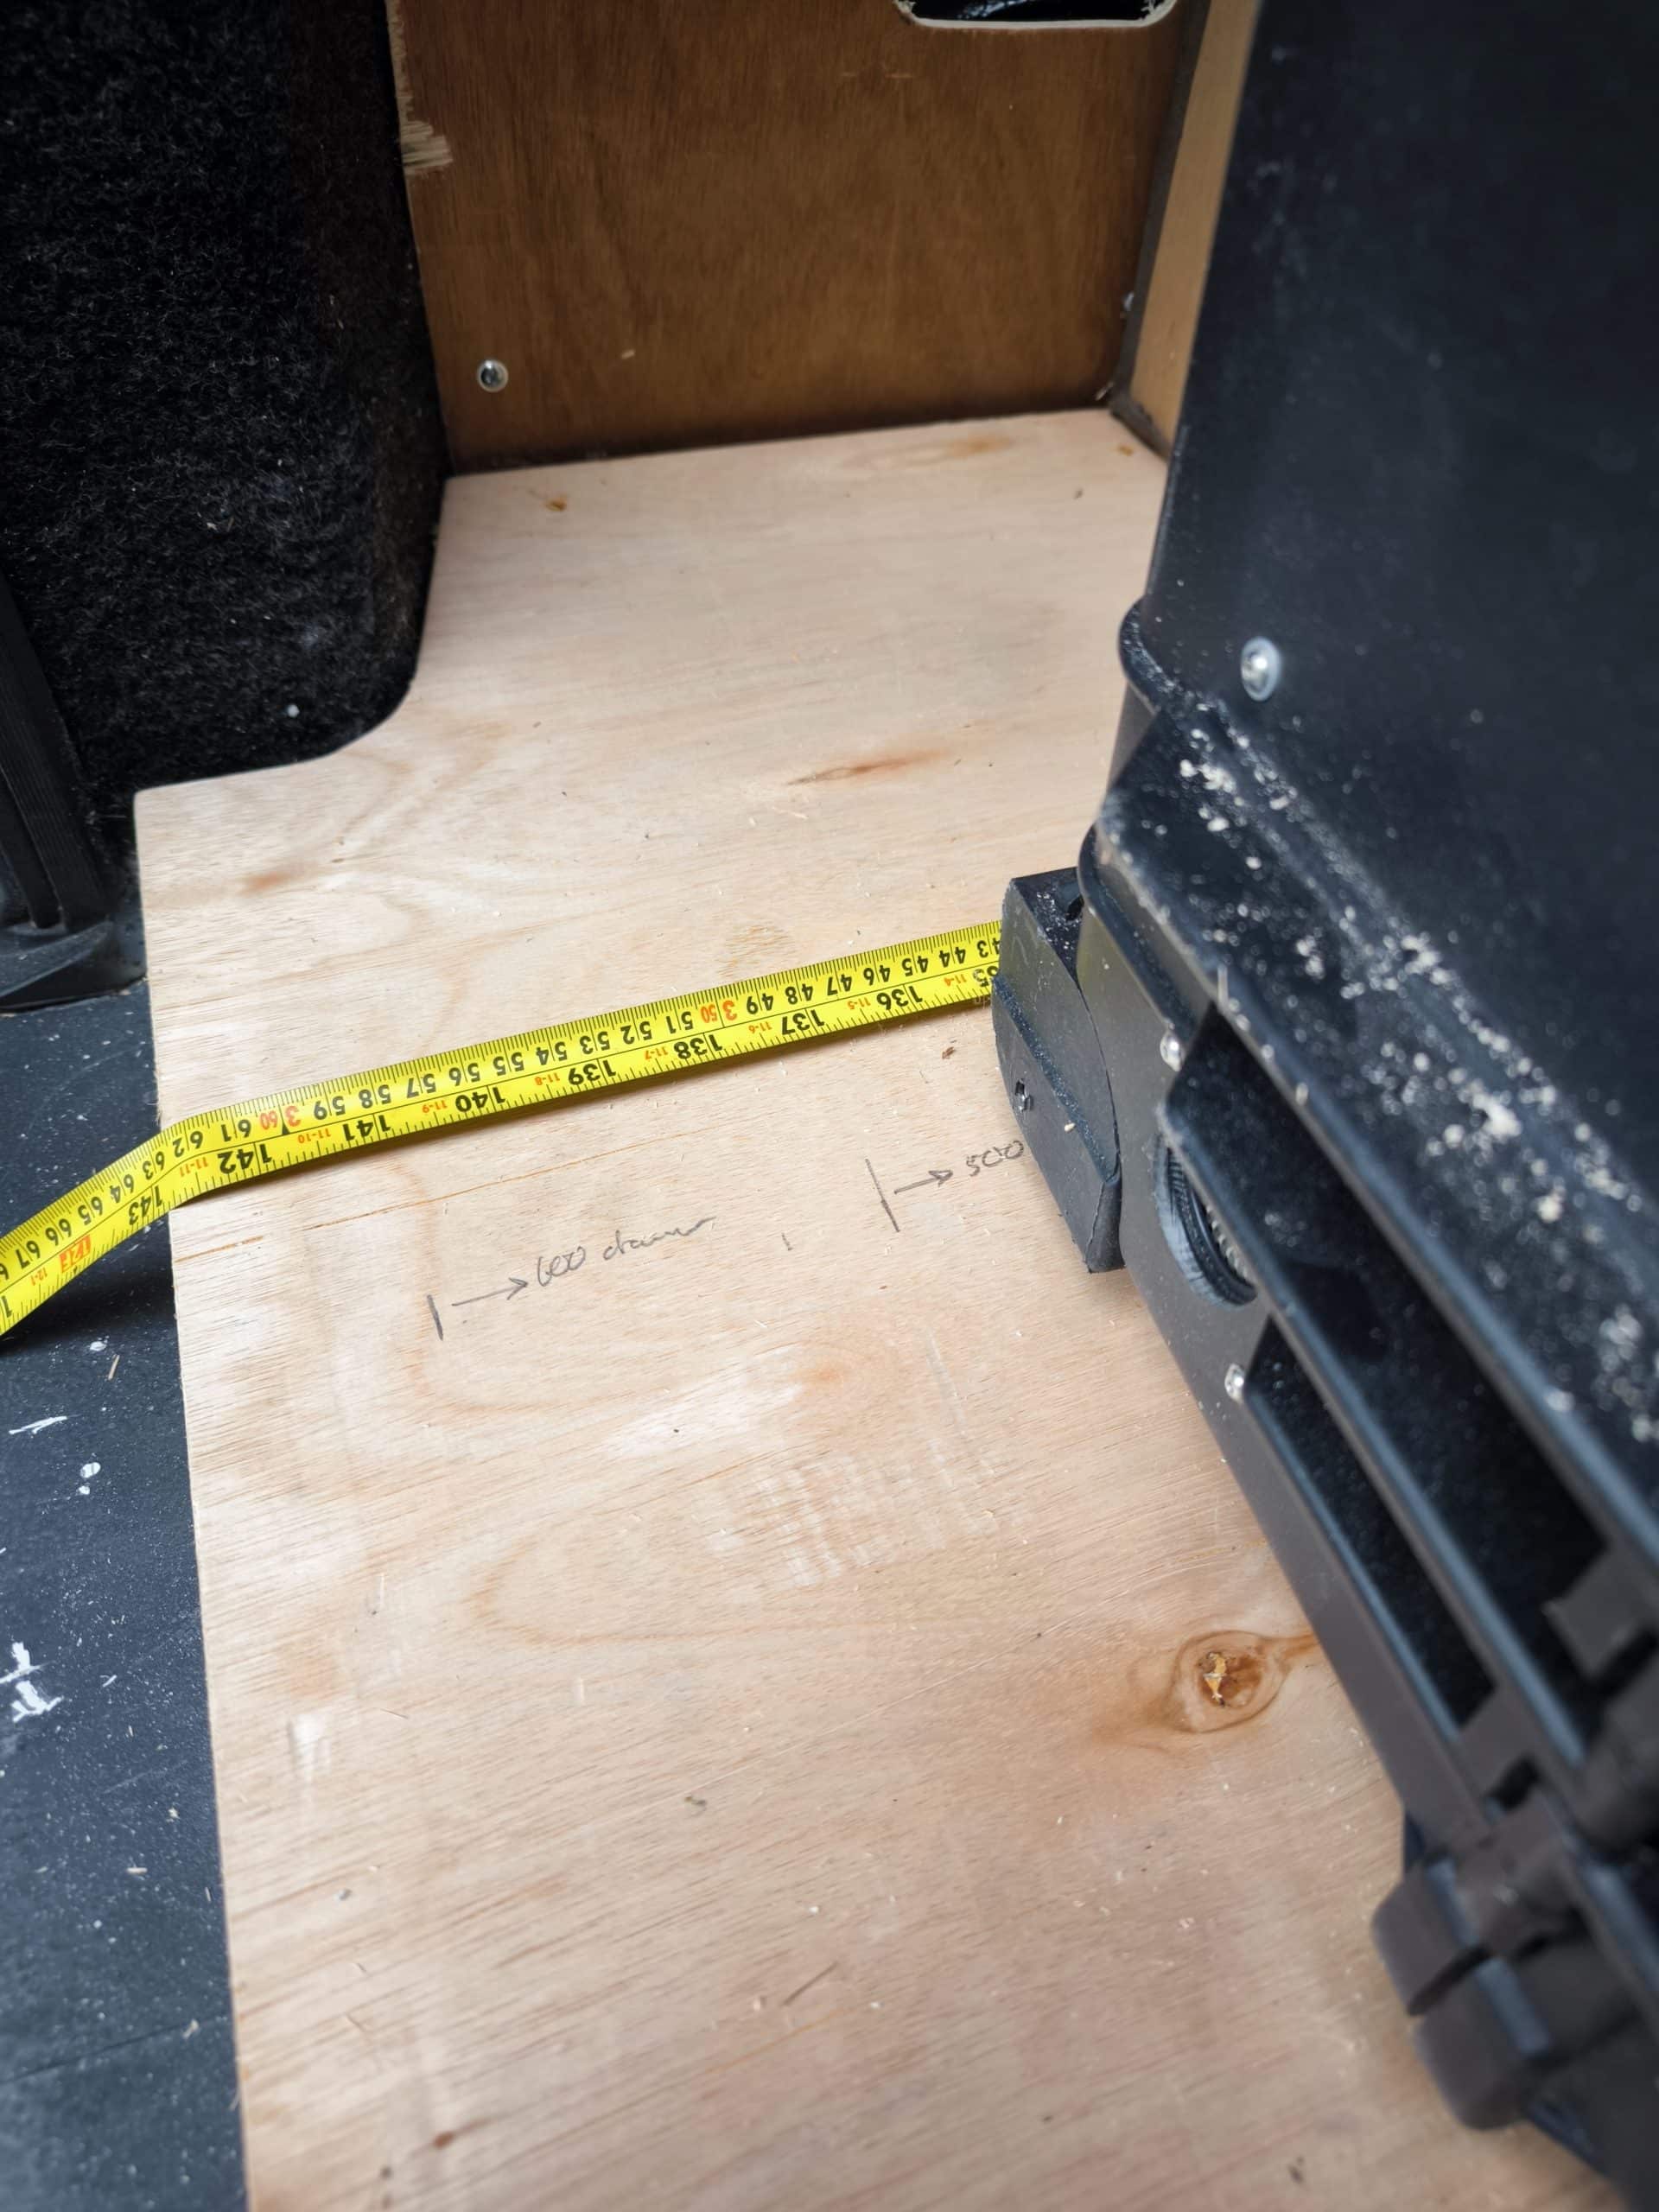
Fridge at one end, I’ll have the battery suitcase at the other end on another heavy duty sliding drawer. This thing weighs…. I dunno how much it weighs, but its a lot and so humping it into the van is really tricky. My plan is to have a slide out shelf meaning I don’t have to lean into the van with the heavy battery. I can just lift it straight up and onto to a waiting shelf, then slide it in. In the process of working out the measurements, I found that I could not have 3x 600mm wide drawer units as planned. And I couldn’t move up the fridge as this was already SO tightly fitted. So My last drawer will have to be 500mm. I’m not sure anyone will notice, but I’ll know its not uniform and that’s kinds frustrating, but its a knock on effect of the space available.
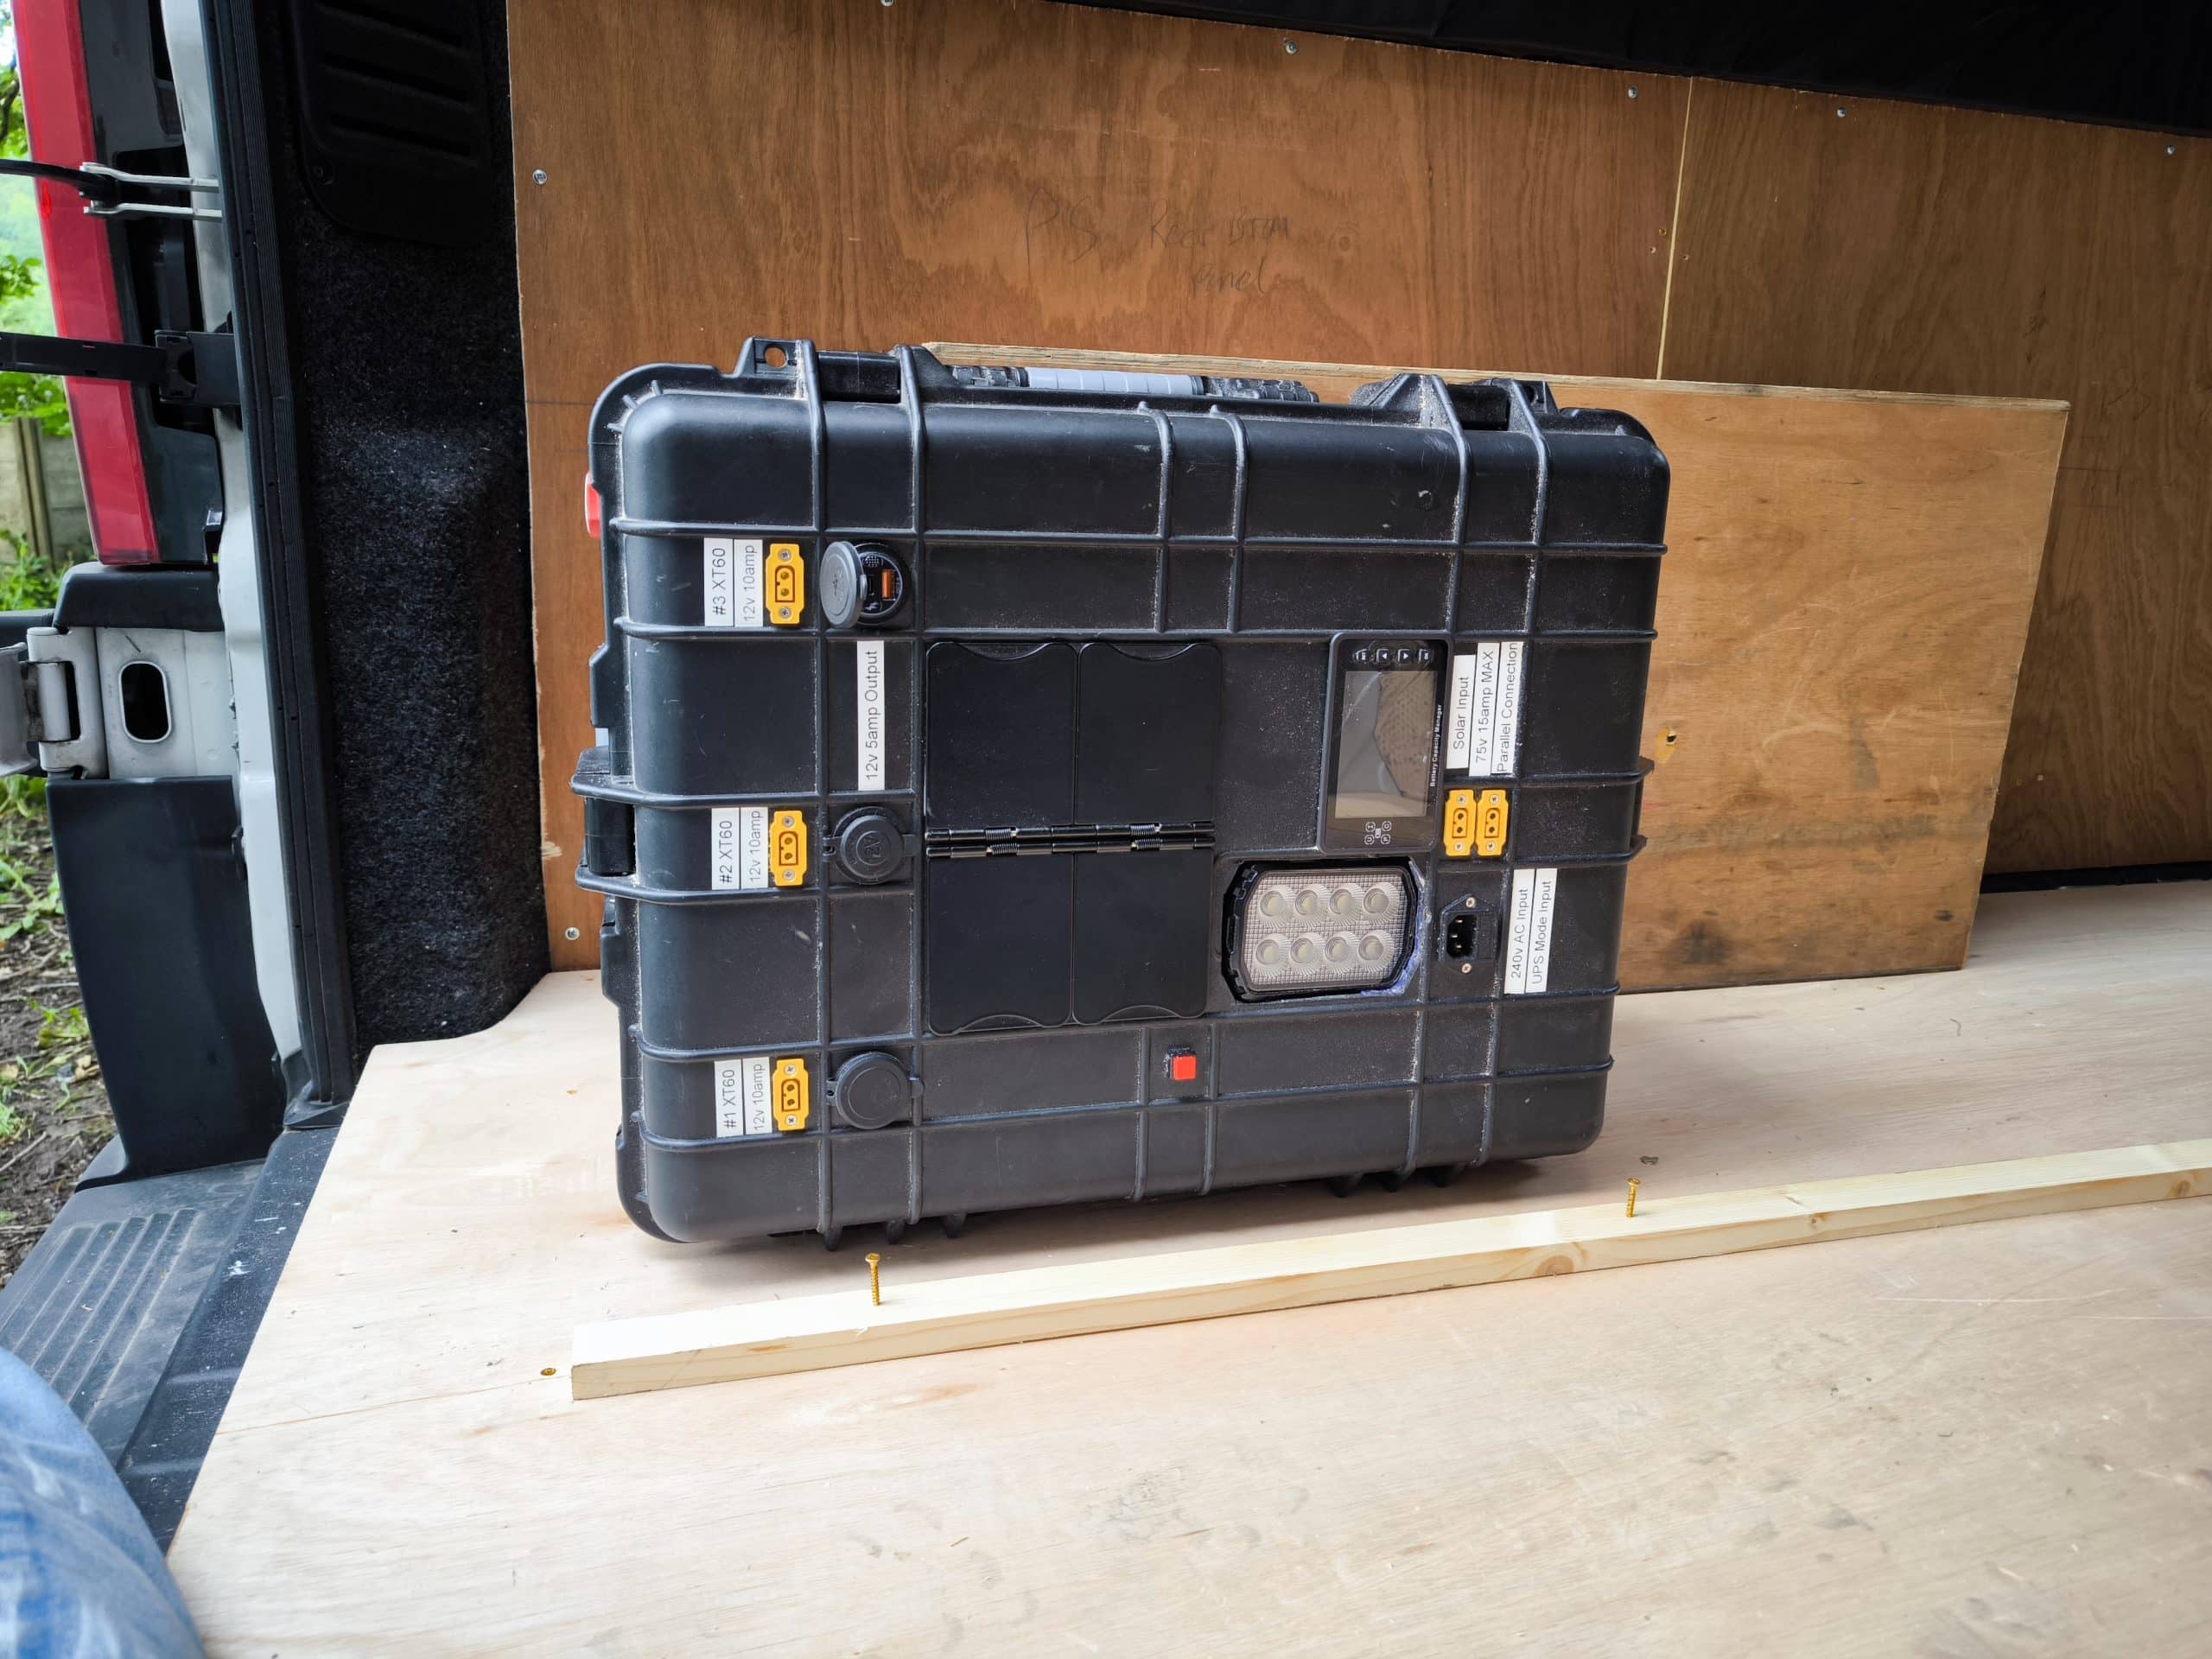
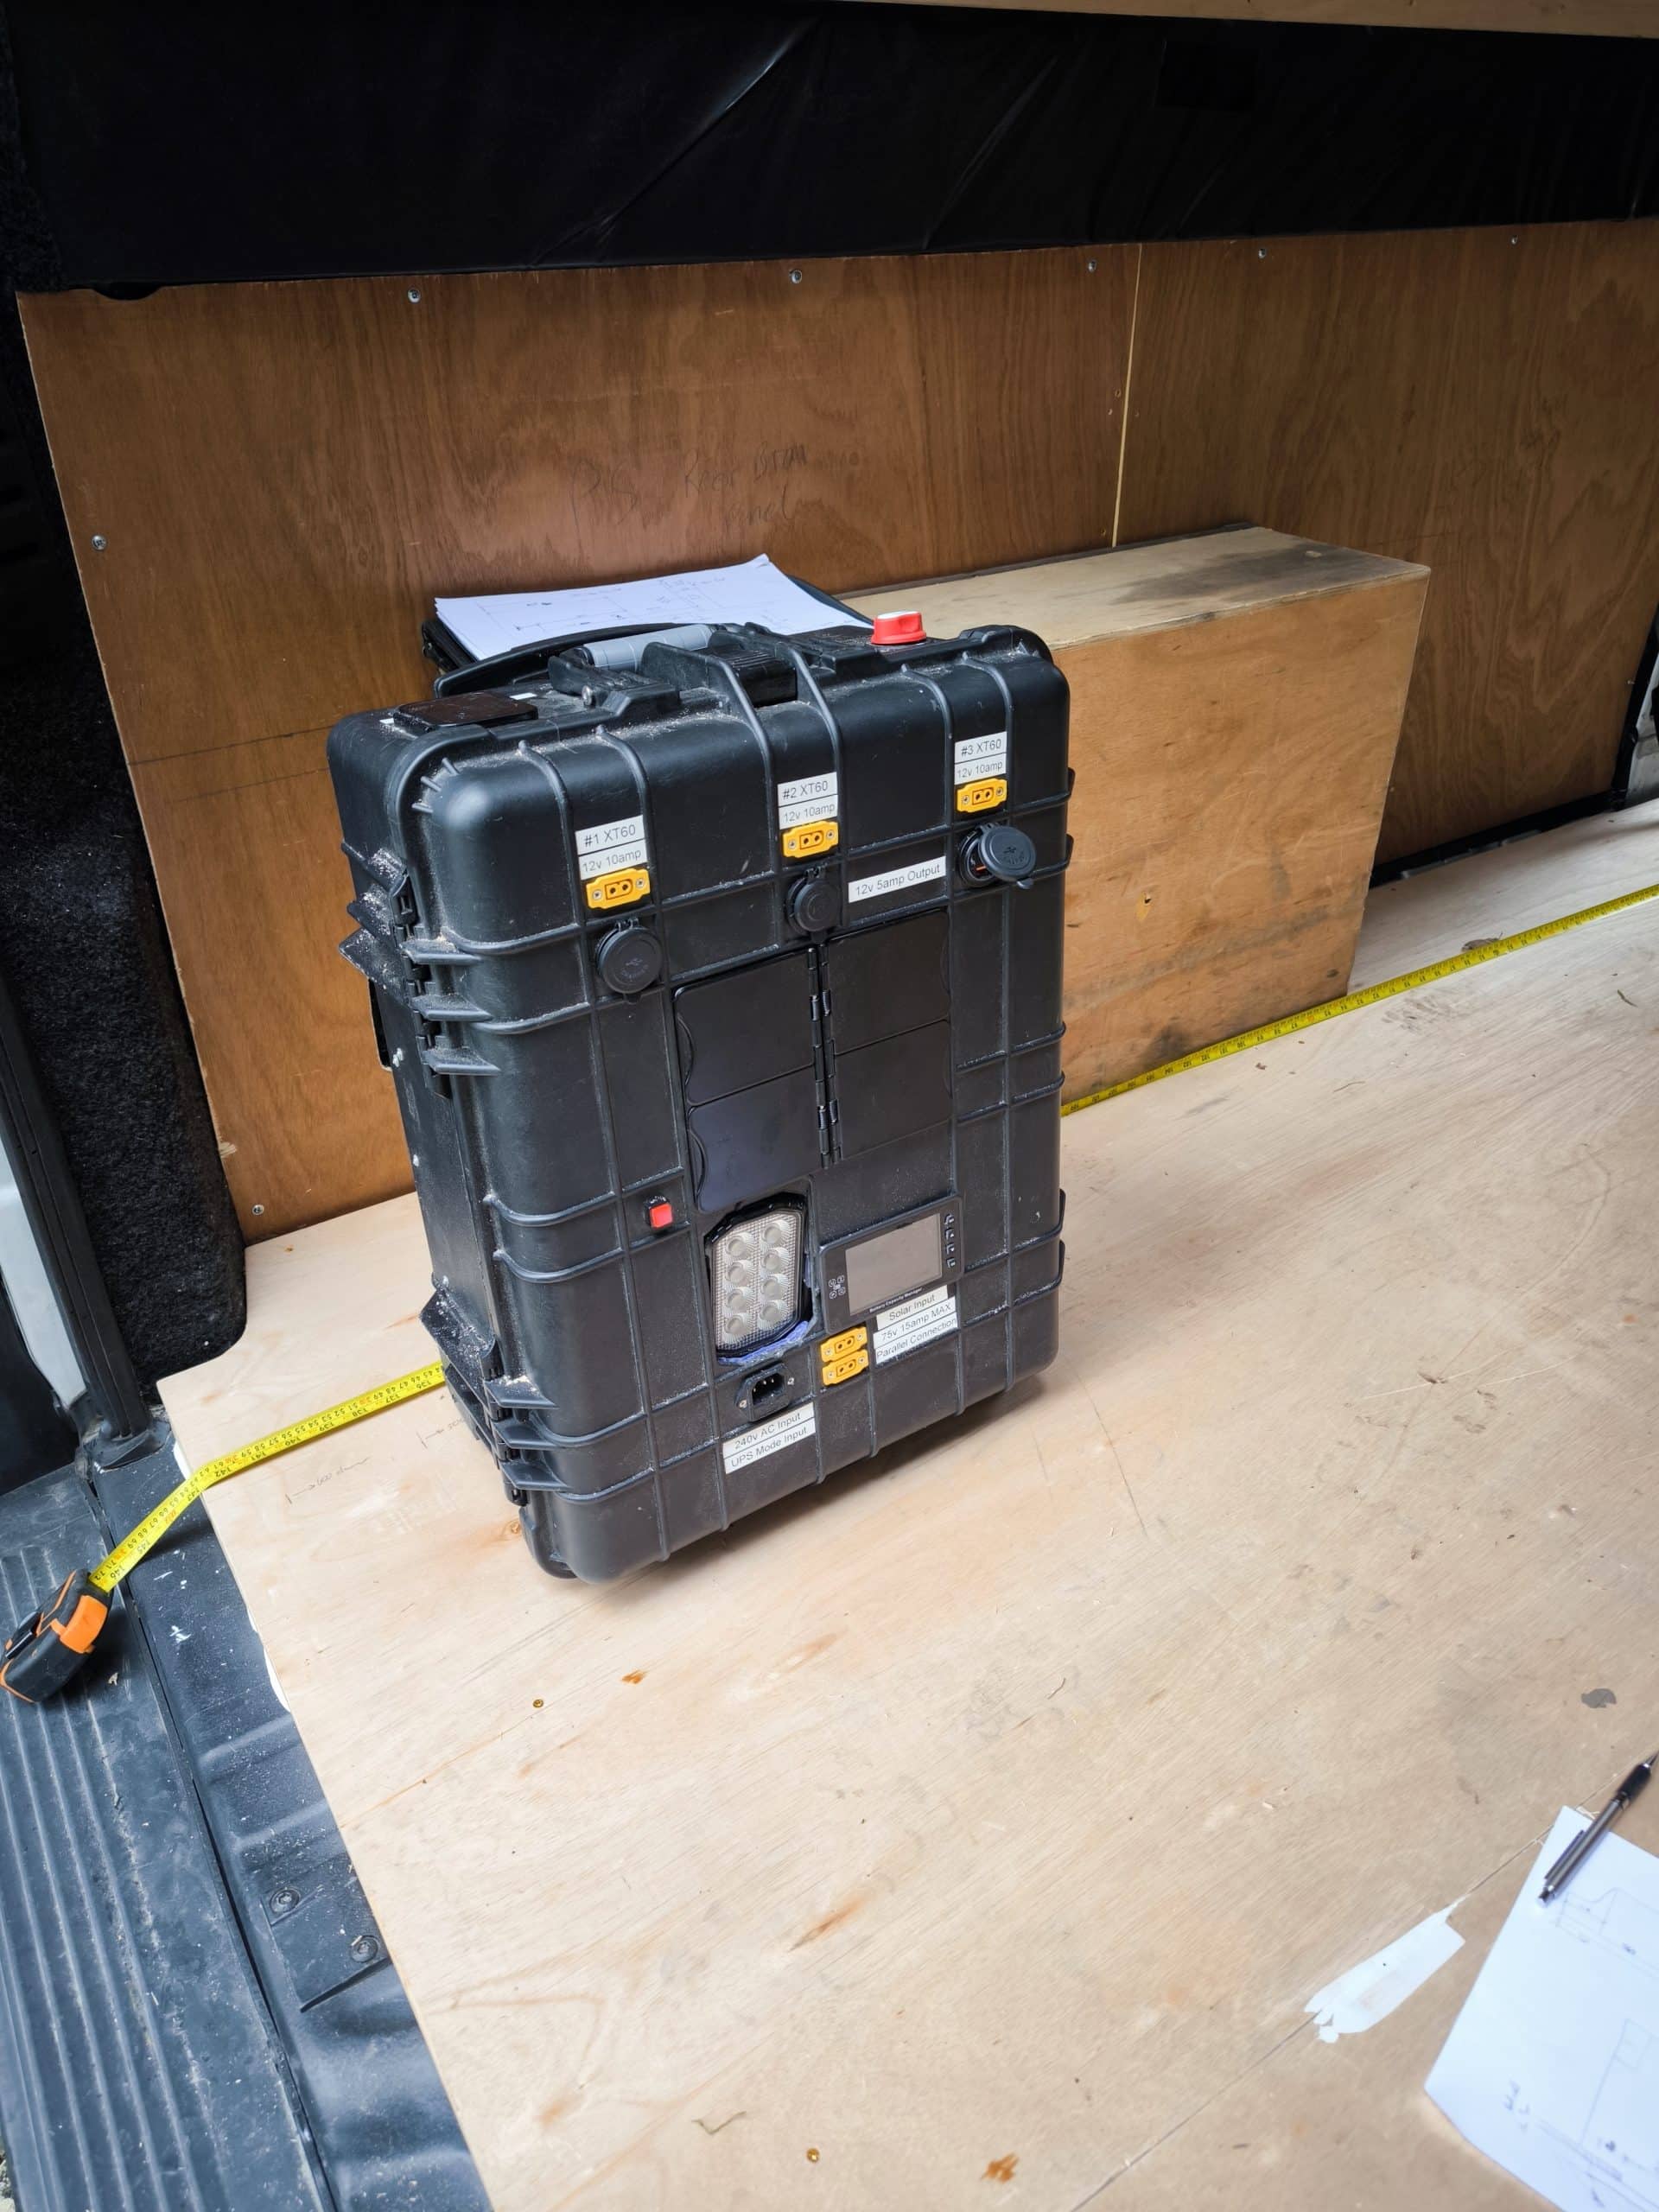
That 500mm drawer also means that I cannot lay flat the battery box, as I wanted to. This is so it fits within the carcass of the cabinet and avoids cutting a huge hole in what will be a structural bit of ply. I could reinforce the ply with a baton, like I will have to do at the end of the run, but that would make the drawer even skinnier.